Setup your Instagram channel
If you are using a self-hosted UniLink installation, please setup your Instagram app as described in the this guide.
For the cloud version of UniLink, please follow the steps below.
Setting up Instagram
Step 1: Make sure you have a Business Instagram account. Follow this guide from Instagram to help with the same.
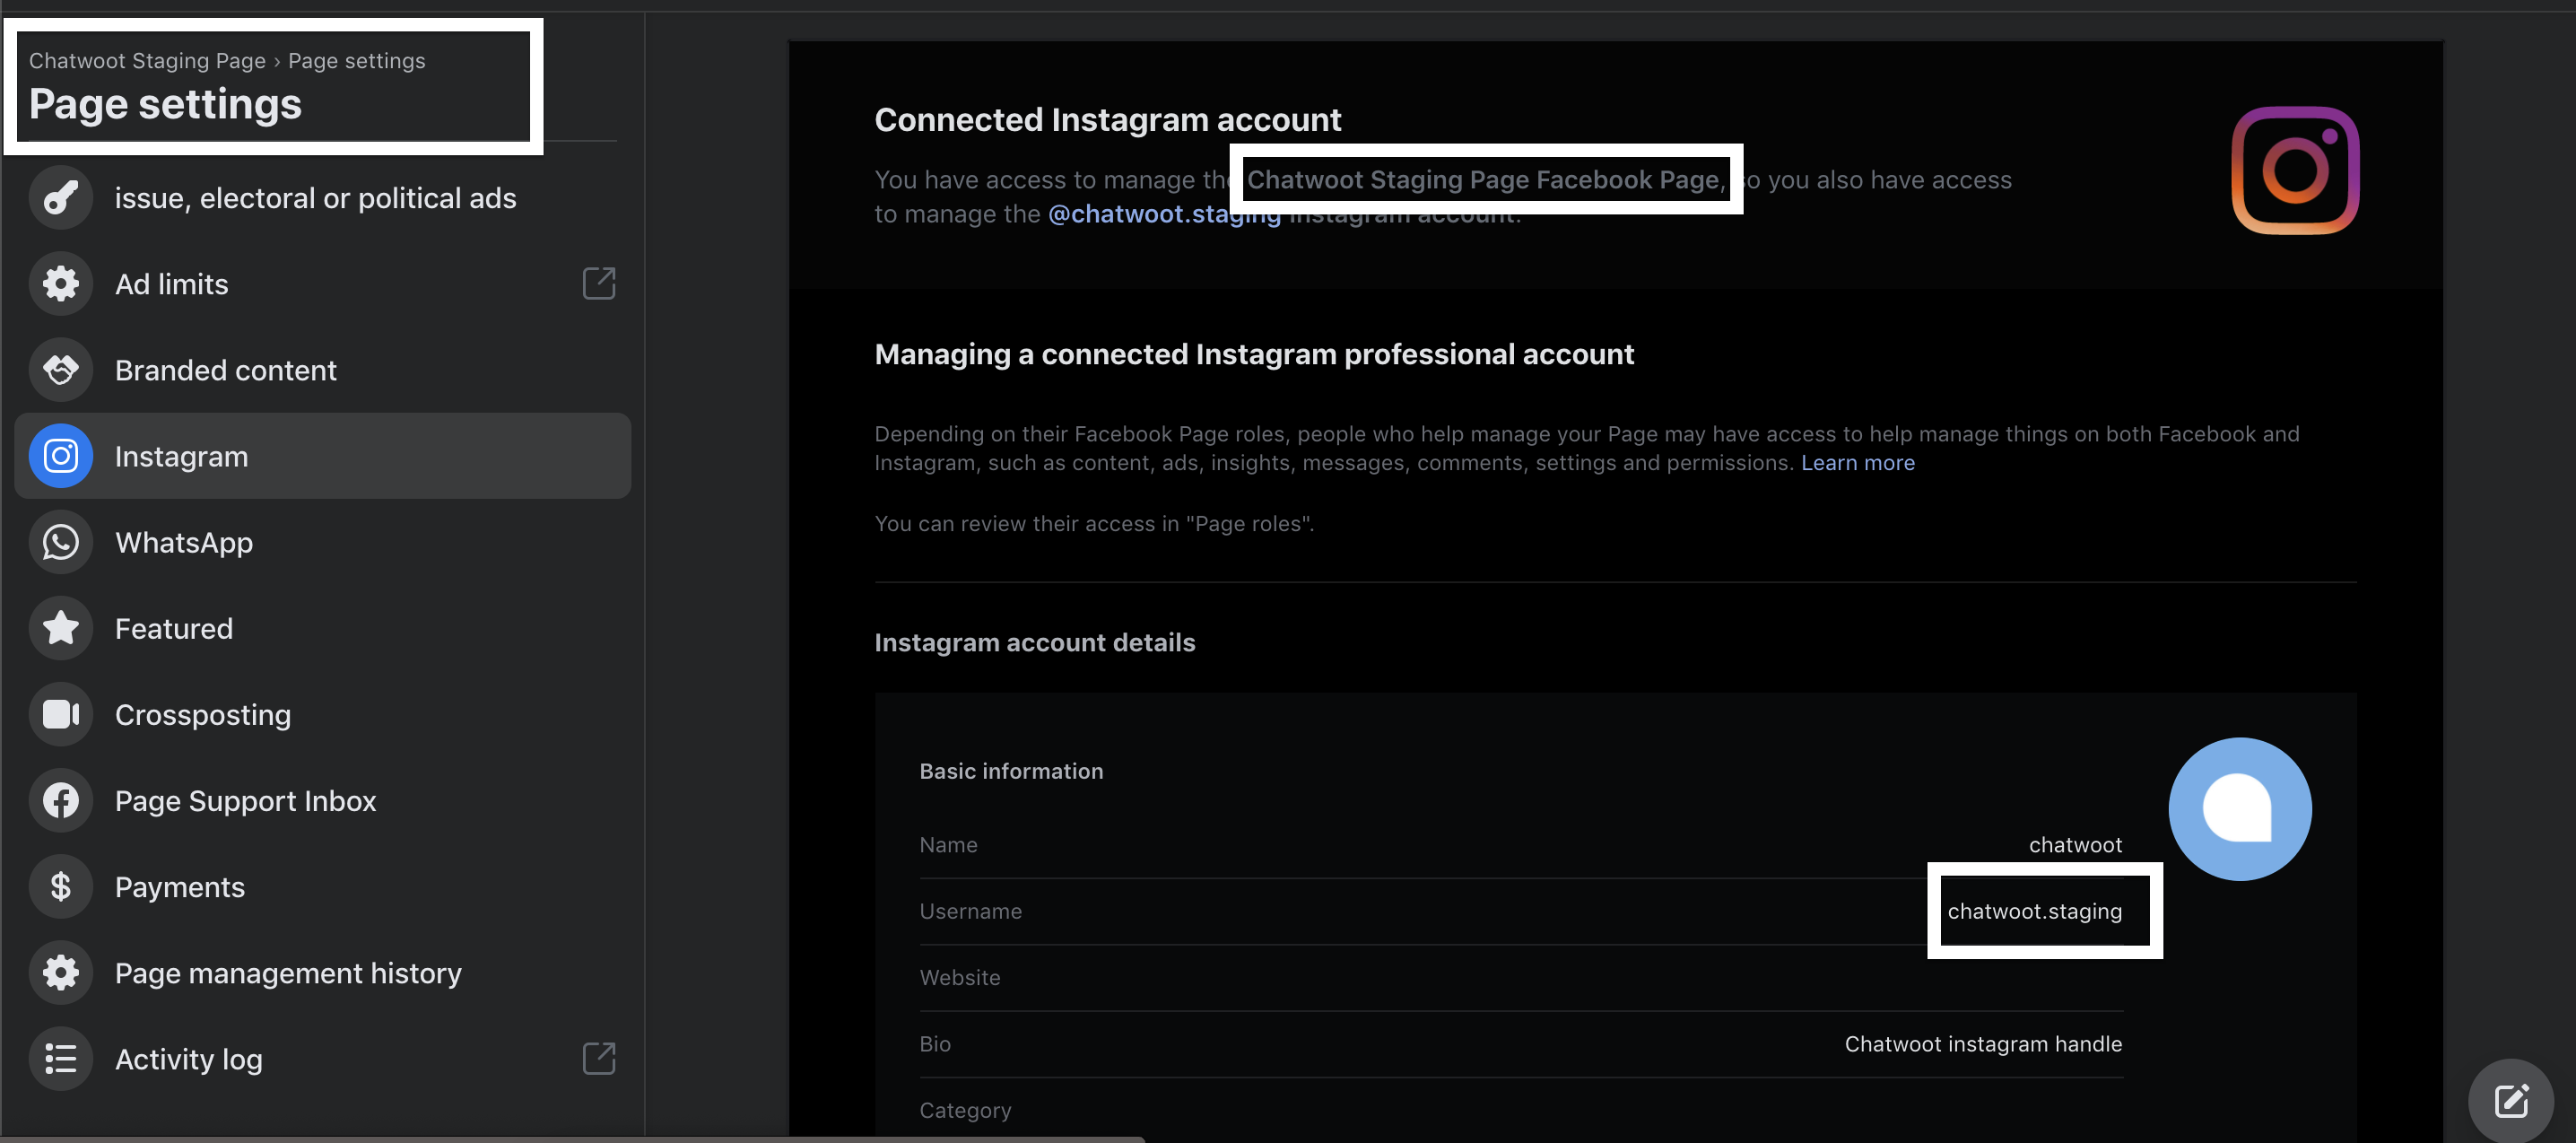
Step 2: Make sure your Facebook page is connected to this Instagram account. To connect Facebook and Instagram, follow these steps:
- Go to https://www.facebook.com/pages/?category=your_pages
- Select Your Page
- Go to Settings
- Select “Instagram” and connect your business account as shown below:
Now switch back to UniLink App.
Connecting Instagram to UniLink
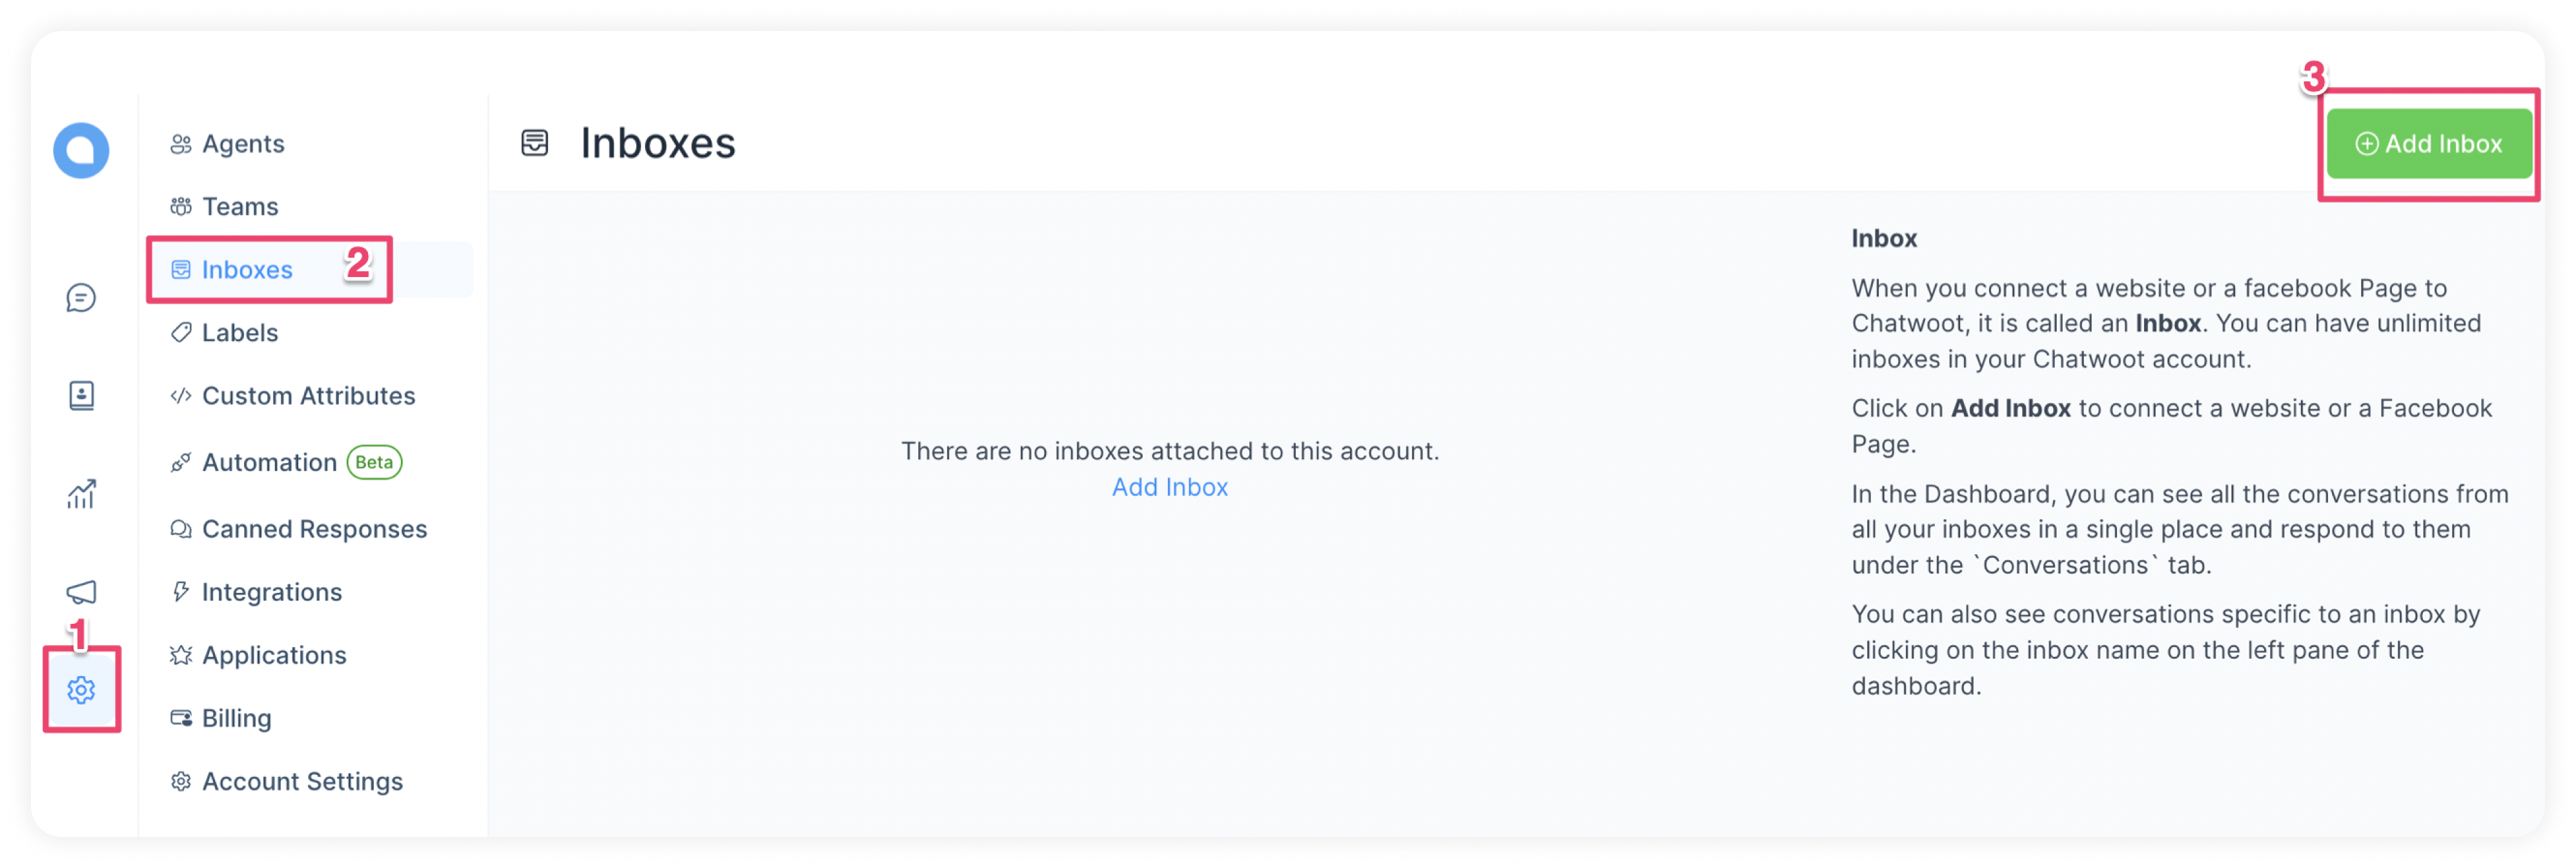
Step 1. Go to Settings → Inboxes → “Add Inbox”.
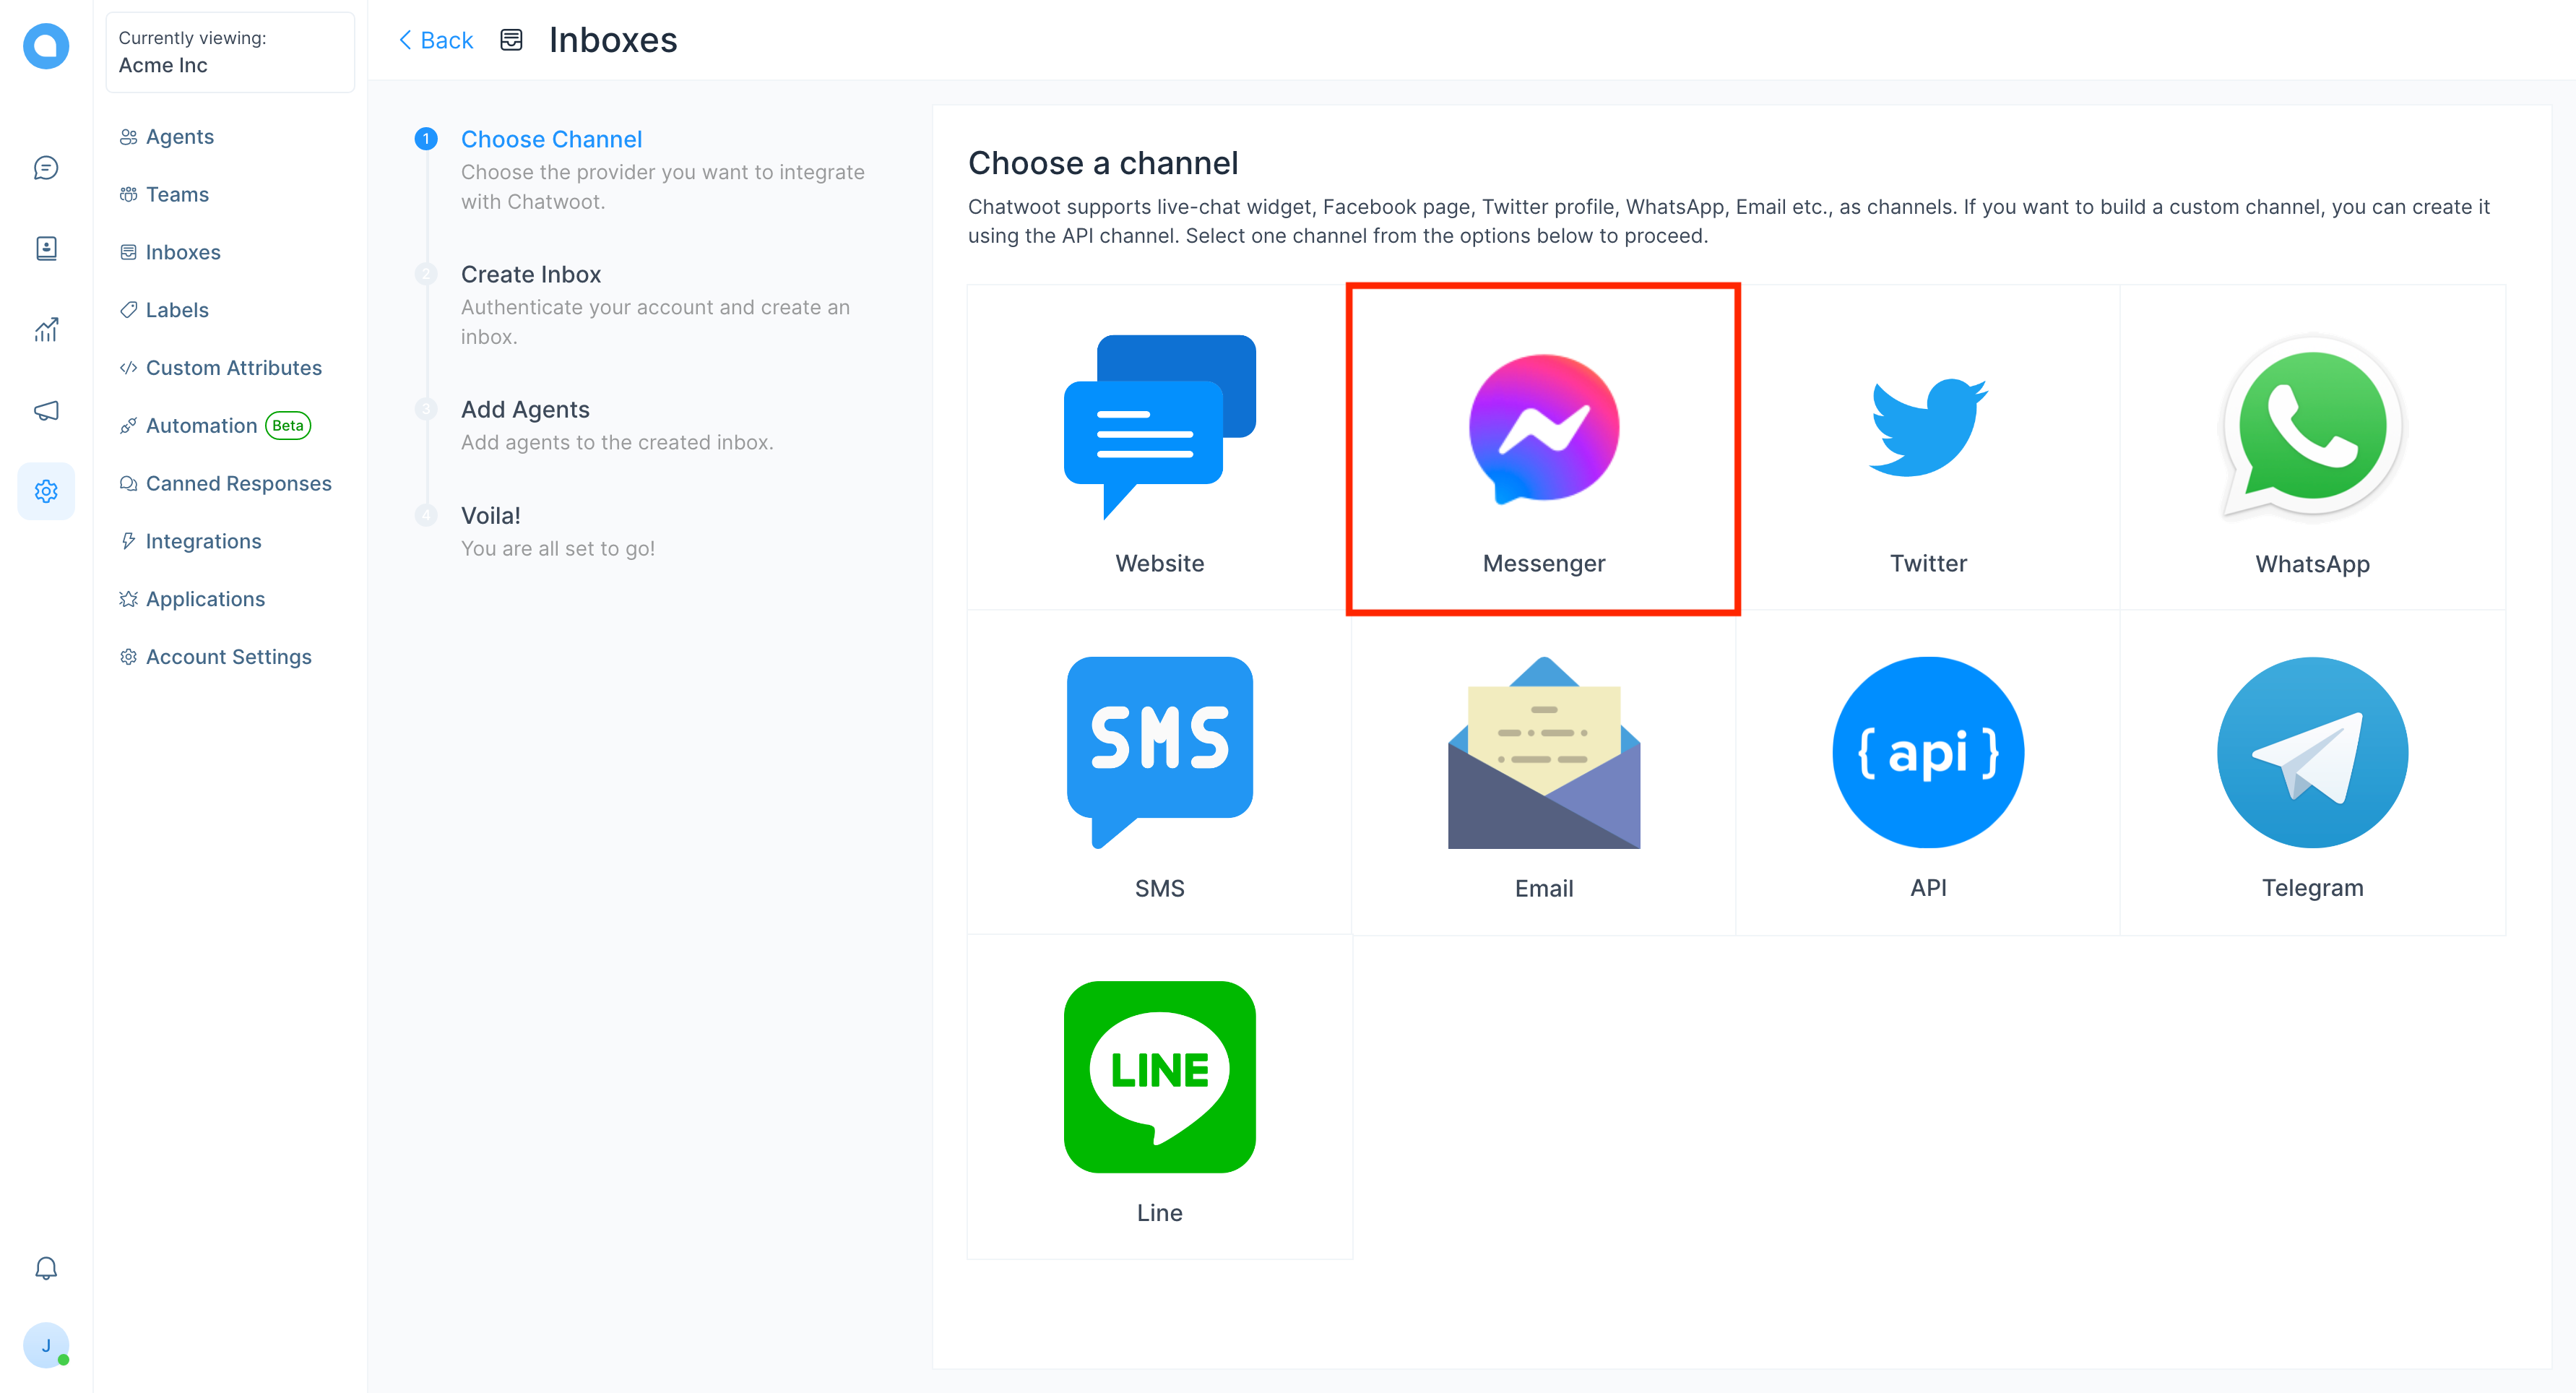
Step 2. Click on the "Messenger" icon.
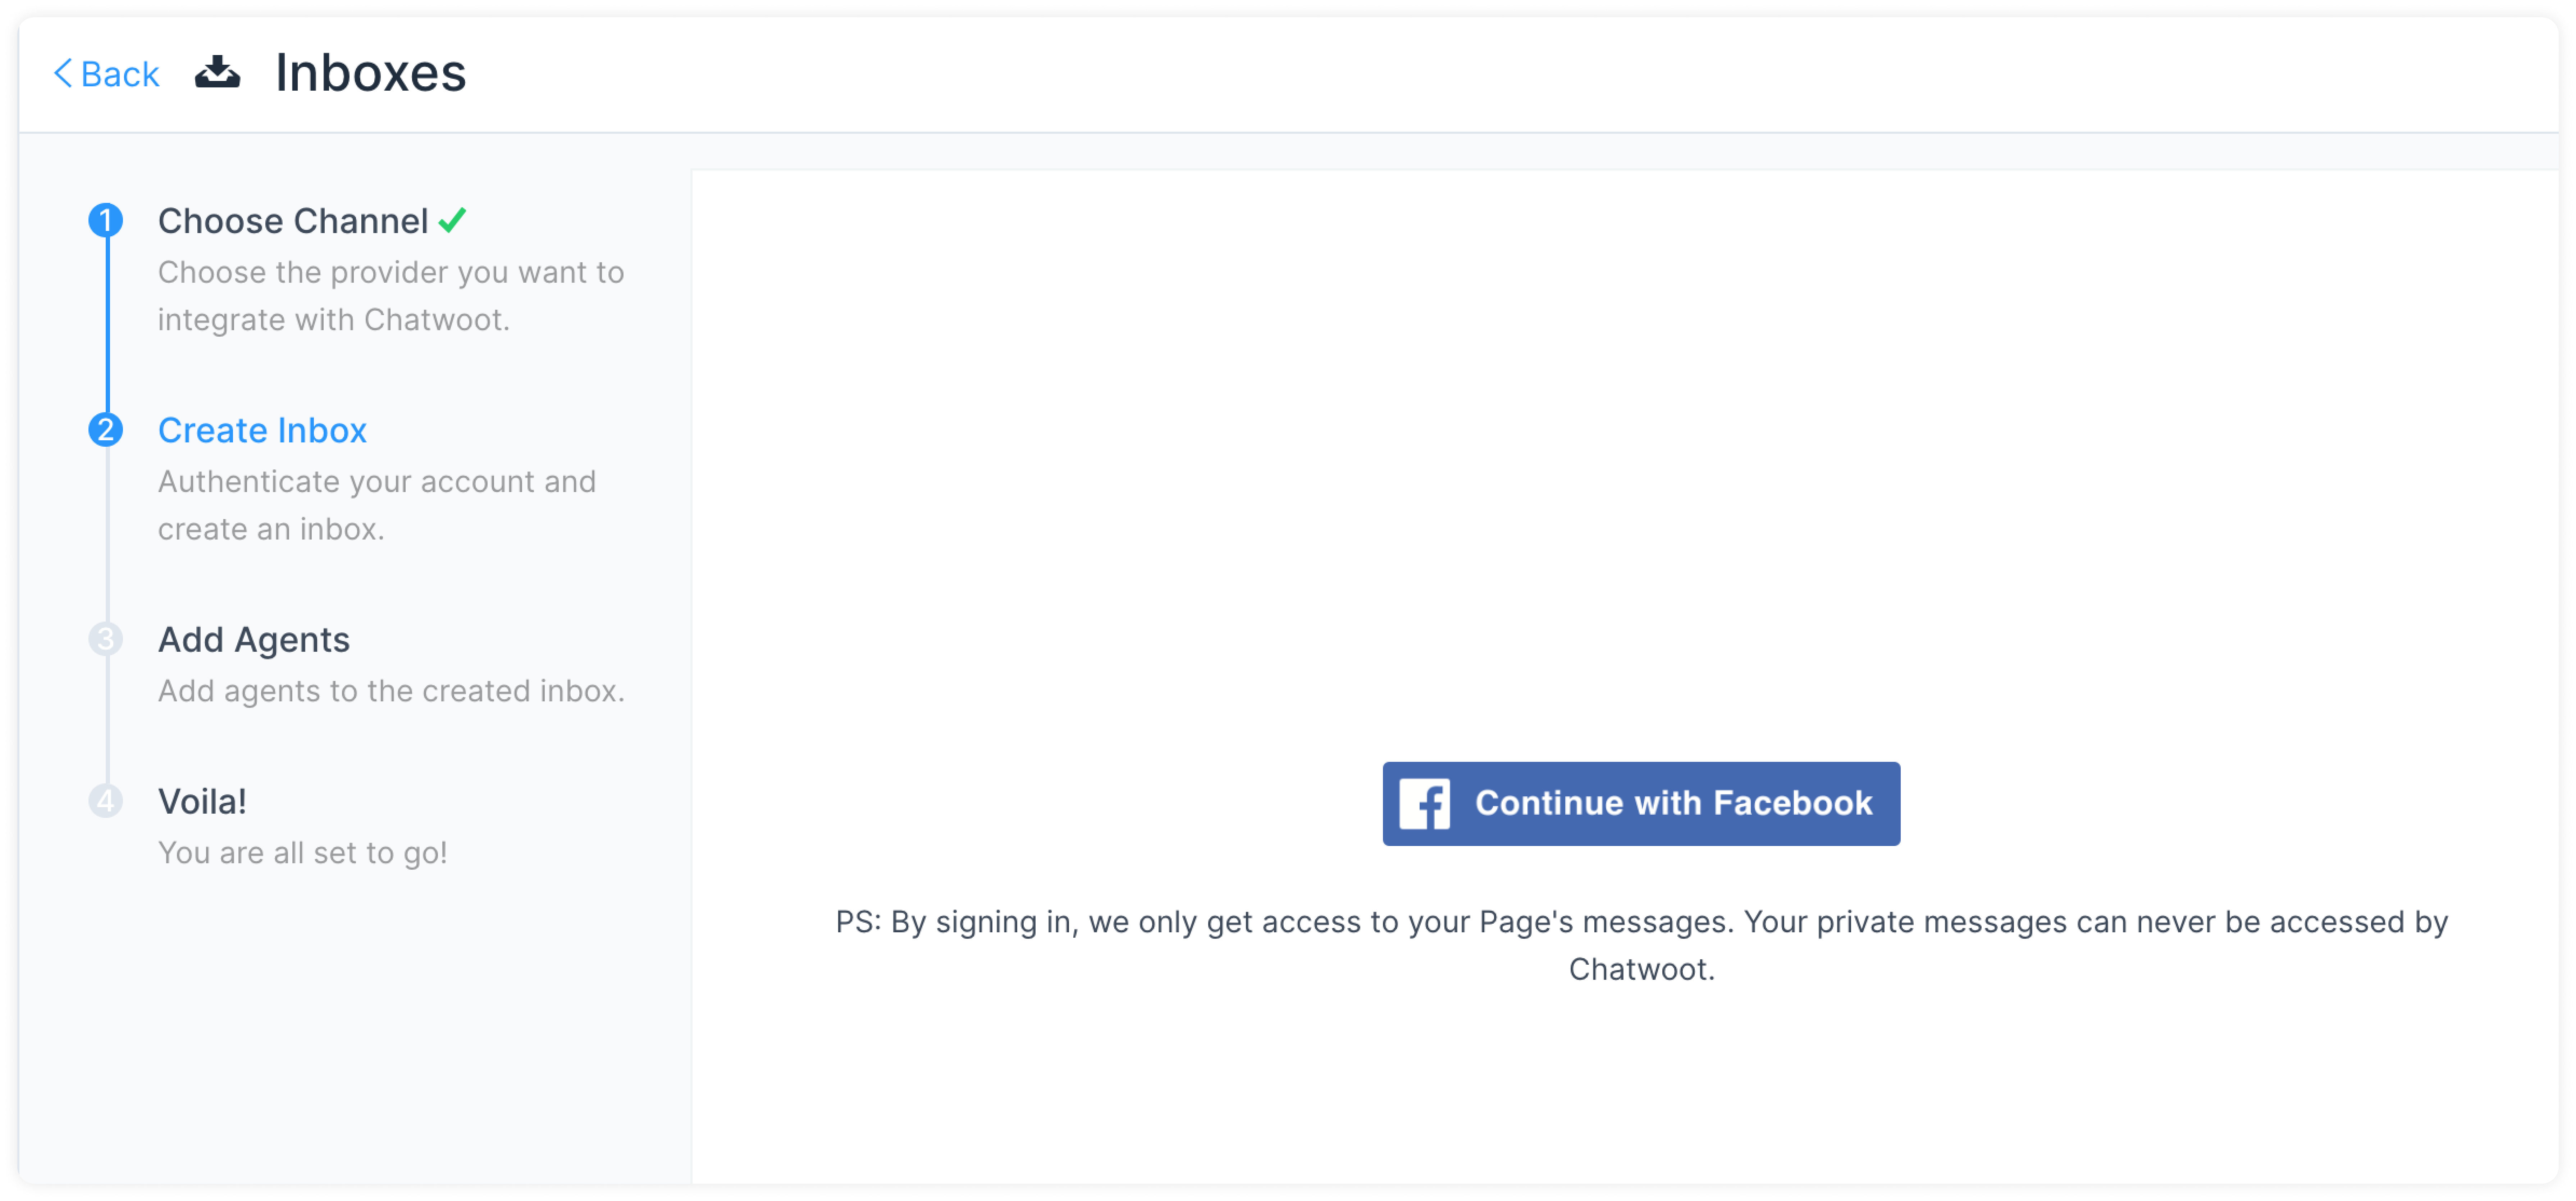
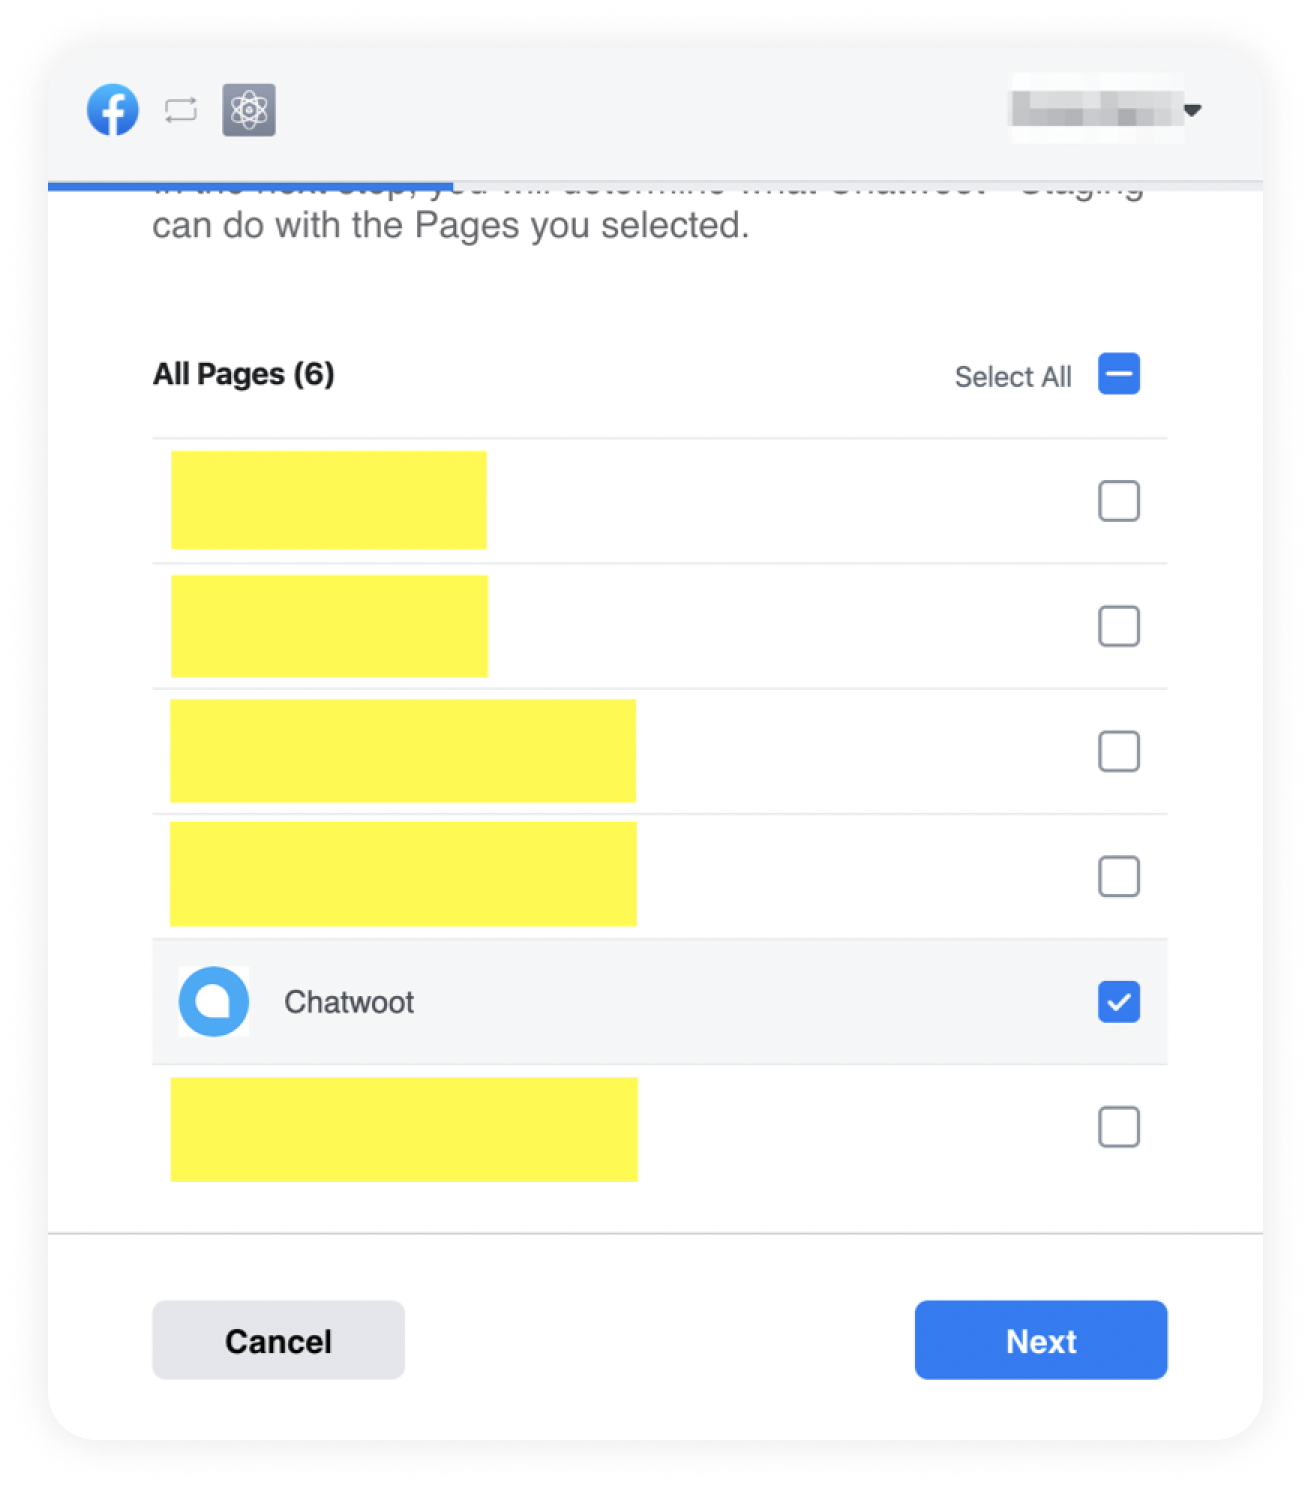
Step 3. Click on the Facebook login button. It will open a new window for you to log in.
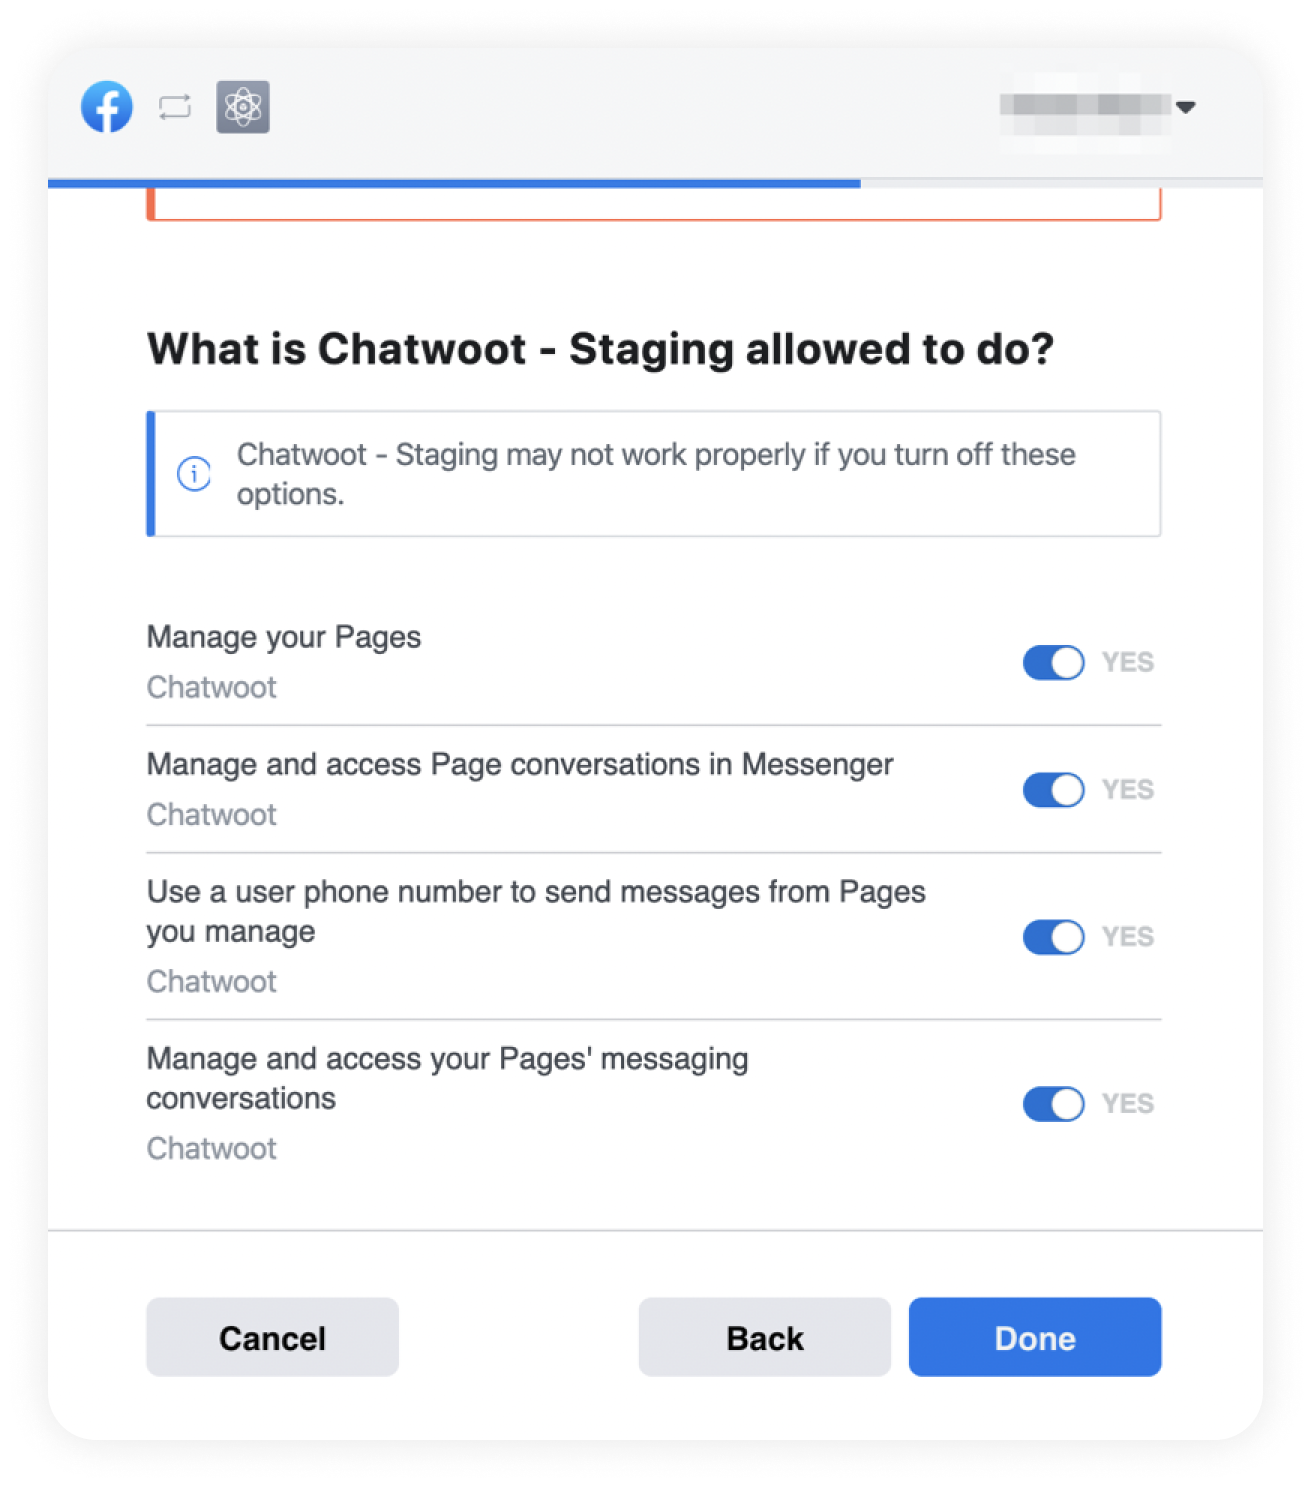
Step 4. Authenticate with Facebook, select an Instagram account and select the page you want to connect. Enable all permissions shown in the list. This will help UniLink to perform all the desired actions smoothly.
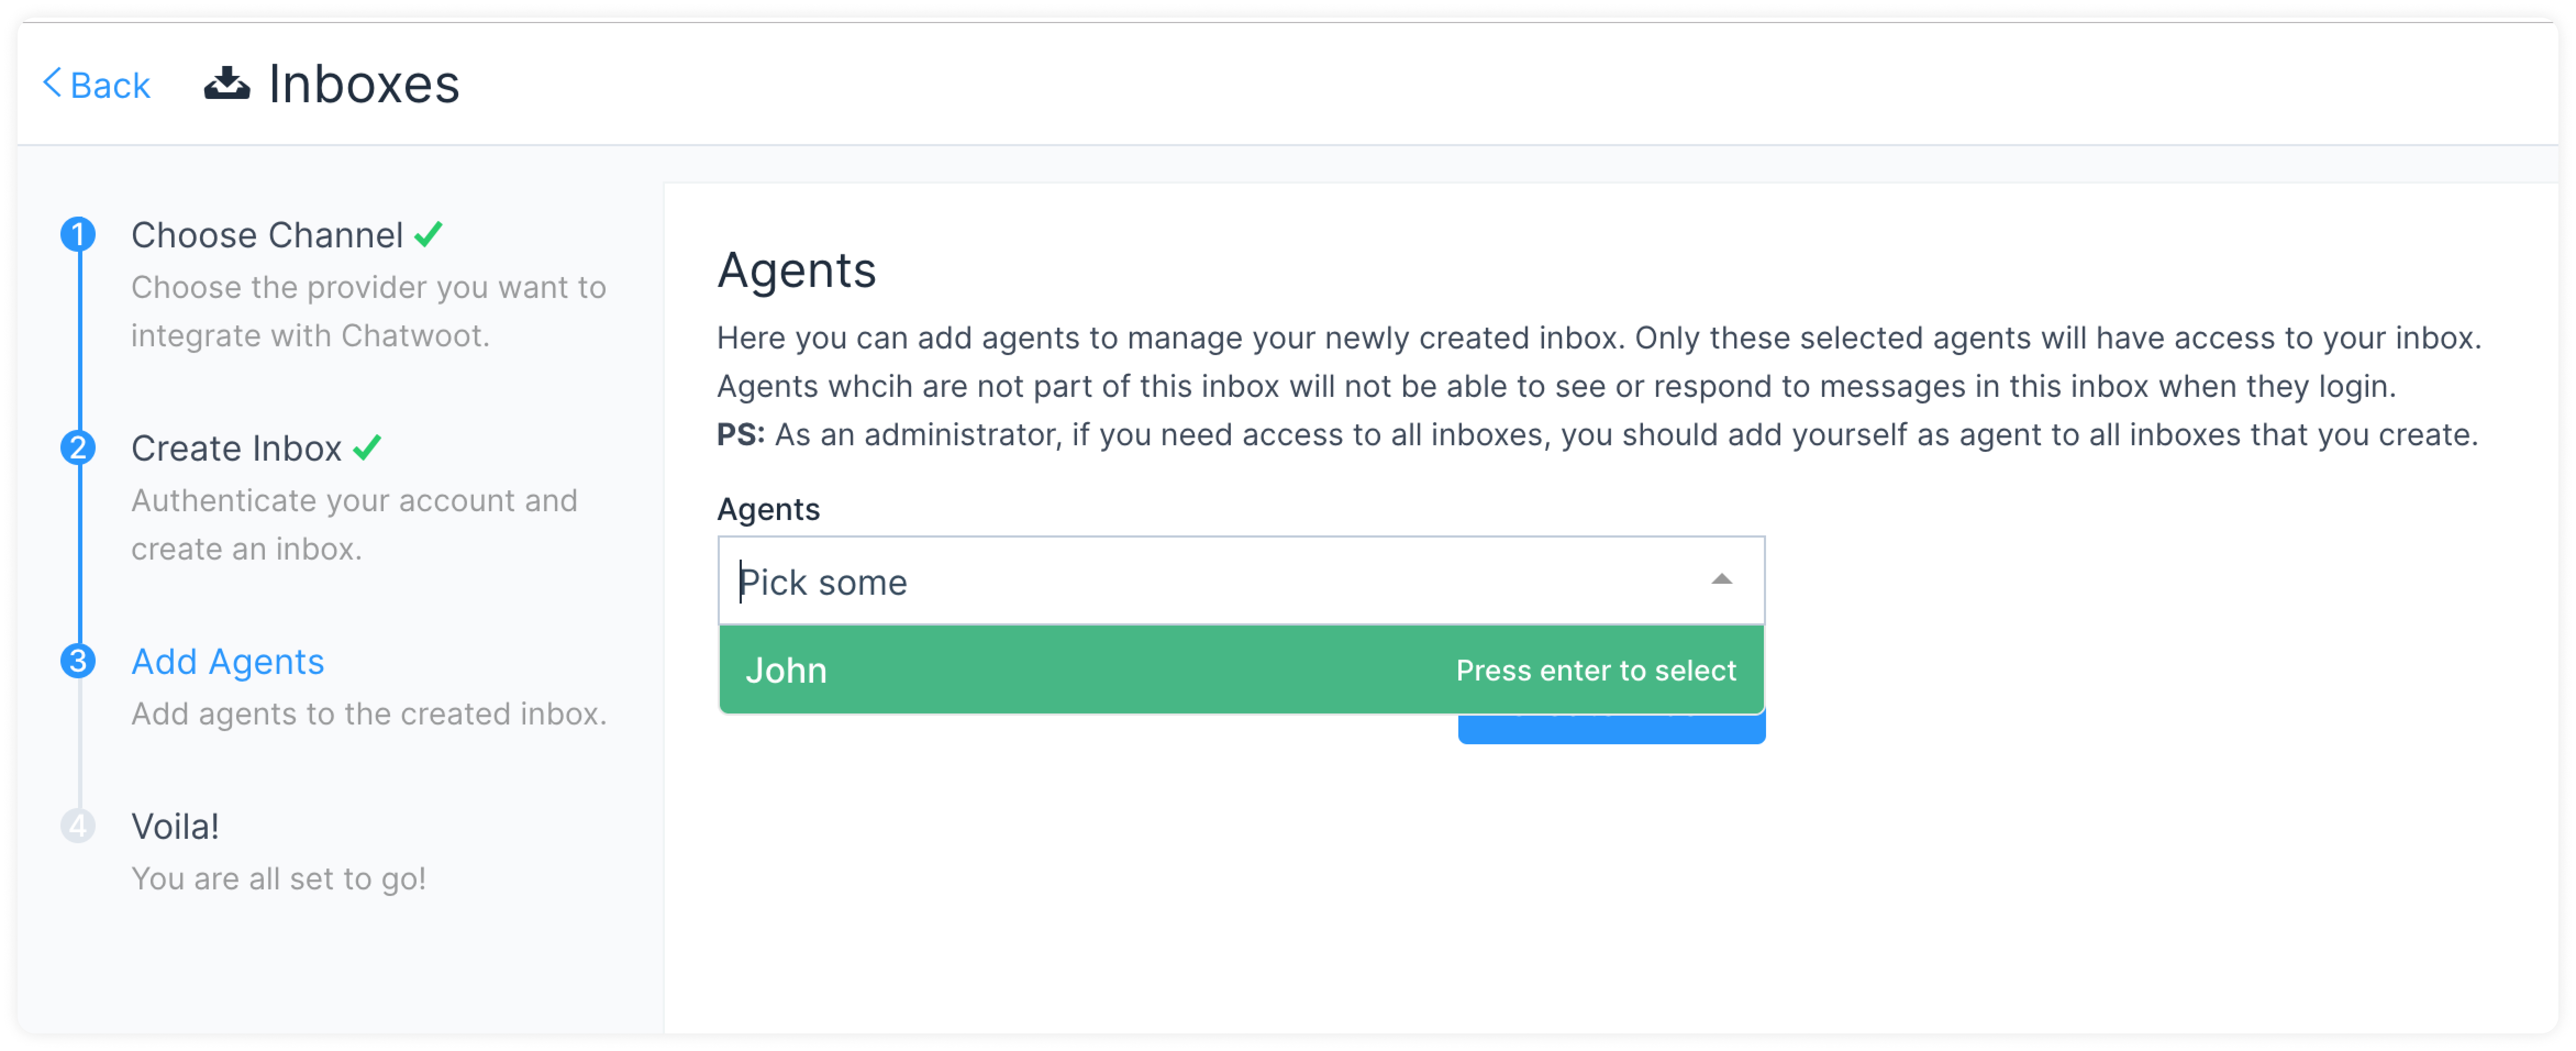
Step 5. "Add agents" to your Instagram inbox.
Hooray! You have successfully created an Instagram inbox. Whenever a customer sends a message to your Instagram account, you will be able to see and reply to it in UniLink.